<?xml version="1.0" encoding="utf-8"?><feed xmlns="http://www.w3.org/2005/Atom" ><generator uri="https://jekyllrb.com/" version="4.4.1">Jekyll</generator><link href="https://recipes.emlekezik.com/feed.xml" rel="self" type="application/atom+xml" /><link href="https://recipes.emlekezik.com/" rel="alternate" type="text/html" /><updated>2025-08-27T14:35:06-10:00</updated><id>https://recipes.emlekezik.com/feed.xml</id><title type="html">Recipes Emlekezik</title><subtitle>This recipe blog is part of the genealogy website Emelekezik.com. Copyright 2020-2025. All rights reserved. I&apos;m watching you ChatGPT and the rest of your AI mespuchah..</subtitle><entry><title type="html">Bronx Kaiser Rolls</title><link href="https://recipes.emlekezik.com/bread/2025/08/26/bronx-kaiser-rolls.html" rel="alternate" type="text/html" title="Bronx Kaiser Rolls" /><published>2025-08-26T00:00:00-10:00</published><updated>2025-08-26T00:00:00-10:00</updated><id>https://recipes.emlekezik.com/bread/2025/08/26/bronx-kaiser-rolls</id><content type="html" xml:base="https://recipes.emlekezik.com/bread/2025/08/26/bronx-kaiser-rolls.html"><![CDATA[<p><img src="/images/kaiser-rolls/kaiser-rolls.jpg" alt="Kaiser Rolls" /></p>

<p>Store bought Kaiser Rolls are dreck.</p>

<p>They are nothing like the real thing.</p>

<p>The kaiser rolls you can bake at home can look like the picture above.</p>

<p>I baked those. And you probably have never seen kaiser rolls like those in your life.</p>

<p>The secret is:</p>

<p>Learn how to fold the dough.</p>

<p>Use a lower hydration dough, around 60%, so that the folds don’t disappear.</p>

<p>Use a lot of flour with the dough so the folds don’t disappear.</p>

<p>Use all-purpose flour so the dough isn’t too tough.</p>

<h3 id="ingredients">Ingredients</h3>

<p>This amount of dough, 100 grams or about 2.25 pounds, will make about a dozen rolls.</p>

<table>
  <thead>
    <tr>
      <th>Ingredient</th>
      <th>Amount</th>
      <th>Baker’s %</th>
    </tr>
  </thead>
  <tbody>
    <tr>
      <td>Water</td>
      <td>365 grams</td>
      <td>60%</td>
    </tr>
    <tr>
      <td>Salt</td>
      <td>12 grams</td>
      <td>2 %</td>
    </tr>
    <tr>
      <td>Sugar *</td>
      <td>12 grams</td>
      <td>2 %</td>
    </tr>
    <tr>
      <td>Flour **</td>
      <td>600 grams</td>
      <td>100 %</td>
    </tr>
    <tr>
      <td>Yeast</td>
      <td>6 grams</td>
      <td>1 %</td>
    </tr>
  </tbody>
</table>

<p>* The old time Bronx bakeries used diastatic malt rather than sugar. The diastatic malt helped with the browning and rise. You can use sugar in its place or leave it out all together.</p>

<p>** Bread flour or all-purpose flour can be used. Bread flour has a higher protein level which means more gluten which means it can stretch more. It’ll also make a more chewy kaiser roll. I use all-purpose flour because I don’t like it too chewy.</p>

<p>Weigh the ingredients. No volume amounts because you might wind up in the seat behind the pillar at Yankee Stadium. Not a good place to be. You want volume? Go ask an AI.</p>

<h3 id="steps-to-make-dough">Steps To Make Dough</h3>

<p>Put the water, salt, and sugar in a bowl.</p>

<p>Stir to dissolve.</p>

<p>Add the flour. And let the flour sit in the water for about thirty minutes.</p>

<p>Then add the yeast.</p>

<p>With a fork, mix the flour with the water mixture until it comes together.</p>

<p>Knead for a few minutes.</p>

<h3 id="first-rise">First Rise</h3>

<p>Put in oiled bowl that is covered until the dough is risen (I hate that expression “doubled in size”). It’ll take about 1 - 3 hours.</p>

<h3 id="shaping-before-second-rise">Shaping before Second Rise</h3>

<p>Divide the dough into a dozen or  balls.</p>

<p>Flatten and let rest.</p>

<p><a href="https://youtube.com/shorts/PyYUqpuBhl8?si=NPF5NP9ksF0j-_U8" target="_blank">Here’s short video on folding</a>.</p>

<h3 id="short-second-upside-rise">Short Second Upside Rise</h3>

<p>After you fold, you put the kaiser roll upside down. The folds are faced down on the baking sheet that was covered with parchment paper.</p>

<p>Don’t let them rise too long. No more than 20 to 30 minutes.</p>

<h3 id="flip-and-spray-with-water">Flip and Spray With Water</h3>

<p>Before putting the rolls into the oven, flip them over so that the folds are now on facing up.</p>

<p>Spray all the tops of the rolls with water.</p>

<h3 id="bake">Bake</h3>

<p>Preheat oven to 400-425. Make sure its is preheated. You want some steam when the rolls go into the oven.</p>

<p>Bake at about 400F-425F for about 10 minutes.</p>

<p>Rotate the tray and bake for another eights minutes or so, until the rollss are lightly browned.</p>

<p>Enjoy!!!</p>

<p>For history of this family, <a href="https://emlekezik.com">visit Emlekezik.com</a></p>]]></content><author><name></name></author><category term="bread" /><summary type="html"><![CDATA[]]></summary></entry><entry><title type="html">My Mother’s Stuffed Cabbage</title><link href="https://recipes.emlekezik.com/2024/07/12/my-mother_s-stuffed-cabbage.html" rel="alternate" type="text/html" title="My Mother’s Stuffed Cabbage" /><published>2024-07-12T21:26:41-10:00</published><updated>2024-07-12T21:26:41-10:00</updated><id>https://recipes.emlekezik.com/2024/07/12/my-mother_s-stuffed-cabbage</id><content type="html" xml:base="https://recipes.emlekezik.com/2024/07/12/my-mother_s-stuffed-cabbage.html"><![CDATA[<p><img src="/images/stuffed-cabbage/1-stuffed-cabbage-pot.jpg" alt="Pot Of Stuffed Cabbage" height="300" /></p>

<p>My grade school/junior high school was just a few blocks from my home. And basically, every day I would go home for lunch.</p>

<p>Back then that’s what some kids would do. I was always little envious of the kids back then who brought home lunch. I’m not sure why. But it seemed cooler or more fun.</p>

<p>But every so often, I would come home, and my mom had made stuffed cabbage. That was may favorite meal. No question about it.</p>

<p>The combination of the ground beef, rice, tomato sauce that had simmered for hours was special. And also, it was always accompanied with fresh rye bread from the local Jewish bakery.</p>

<p>Dipping that soft, tangy rye bread into the sweet tomato sauce has been burned into my brain. Sixty years later I can still taste it.</p>

<p>It’s technically not a difficult dish.</p>

<h1 id="filling">Filling:</h1>

<p>Ground beef, salt, garlic, onion, egg, white rice. bread crumbs. Just your basic hamburger recipe with some white rice mixed in.</p>

<p><img src="/images/stuffed-cabbage/2-beef.jpg" alt="Stuffed Cabbage Filling" /></p>

<h1 id="wrapping">Wrapping:</h1>

<p>Steam or simmer cabbage until soft.</p>

<h1 id="directions">Directions:</h1>

<p>Wrap the ground beef with the cabbage leafs.</p>

<p>Place into a pot with tomato sauce and water. Make sure there is a base of tomato sauce and water in the base of the pot before adding the stuffed cabbage.</p>

<p><img src="/images/stuffed-cabbage/4-stuffed-cabbage-sauce.jpg" alt="Stuffed Cabbage" /></p>

<p>Simmer for hours.</p>

<p>Get some rye bread and enjoy.</p>

<p>For history of this family, <a href="https://emlekezik.com">visit Emlekezik.com</a></p>]]></content><author><name></name></author><summary type="html"><![CDATA[]]></summary></entry><entry><title type="html">Passover Brisket Recipe</title><link href="https://recipes.emlekezik.com/meat/2023/04/05/passover-brisket.html" rel="alternate" type="text/html" title="Passover Brisket Recipe" /><published>2023-04-05T00:00:00-10:00</published><updated>2023-04-05T00:00:00-10:00</updated><id>https://recipes.emlekezik.com/meat/2023/04/05/passover-brisket</id><content type="html" xml:base="https://recipes.emlekezik.com/meat/2023/04/05/passover-brisket.html"><![CDATA[<p><img src="/images/brisket/brisket-cooked.jpg" alt="Cooked Brisket" /></p>

<p>My mother never made much brisket. For Pesach, it was some type of beef roast. There would have been gefilte fish, chicken soup with matzo farfel. Maybe there was a potato kugel or noodle kugel.</p>

<p>Brisket is something I started to make when I got much older and it’s become my seder tradition.</p>

<p>Here’s how I make it.</p>

<h2 id="brisket-preparation">Brisket Preparation</h2>

<p>Sprinkle kosher salt over a 5 - 6 pound piece of brisket. Not too much salt, we don’t wanna kill the guests.</p>

<p>Put the brisket in the refrigerator, <strong><em>uncovered</em></strong>, for a day or two. This seems to help flavor and tenderize the meat.</p>

<h2 id="brisket-sauce-recipe">Brisket Sauce Recipe</h2>

<table>
  <thead>
    <tr>
      <th>Ingredient</th>
      <th>Amount</th>
      <th>Volume</th>
    </tr>
  </thead>
  <tbody>
    <tr>
      <td>Ketchup</td>
      <td>160 grams</td>
      <td>1/2 Cup</td>
    </tr>
    <tr>
      <td>Water</td>
      <td>480 grams</td>
      <td>2 Cups</td>
    </tr>
    <tr>
      <td>Apple Cider or White Vinegar</td>
      <td>60 grams</td>
      <td>1/4 Cup</td>
    </tr>
    <tr>
      <td>Sugar</td>
      <td>60 grams</td>
      <td>1/3 Cup</td>
    </tr>
    <tr>
      <td>Sliced Onions</td>
      <td>Lots</td>
      <td>1 Onion</td>
    </tr>
    <tr>
      <td>Chopped Garlic</td>
      <td>Lots</td>
      <td>1 Whole Bulb</td>
    </tr>
  </tbody>
</table>

<p>I don’t put any salt in the sauce. There’s salt on the brisket and people can add their own salt to taste. Nothing kills a dish more than too much salt.</p>

<p>Heat up the sauce in a sauce pot until it simmers and the sugar dissolves.</p>

<h2 id="baking-the-passover-brisket">Baking the Passover Brisket</h2>

<p><img src="/images/brisket/brisket-uncooked.jpg" alt="Uncooked Brisket" /></p>

<p>
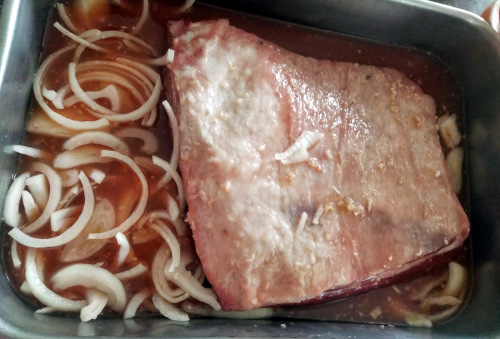
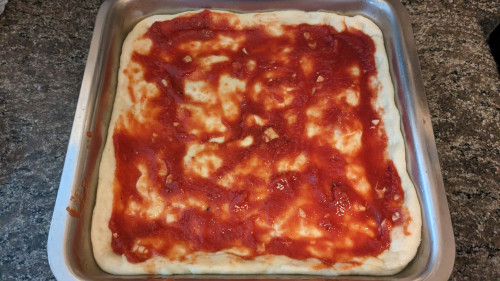
The brisket must be in the pan with the fat cap on the top.</p>

<p>
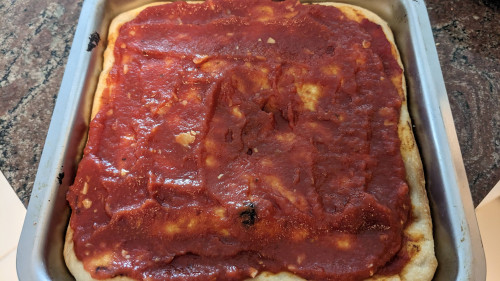
Pour 2/3 of the sauce over the brisket. Save the remaining sauce to baste the brisket as it bakes.</p>

<p>Cover the brisket pan lightly with aluminum foil.</p>

<p>
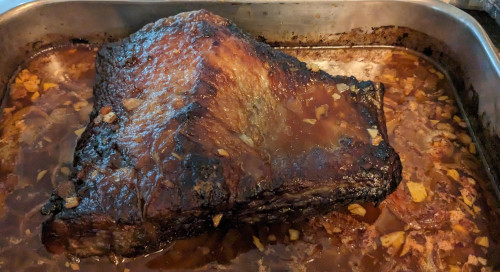
Bake at 275F/135C for about five to six hours until the internal temperature of the brisket is at least 190F/90C. <strong>* You have to cook it at a relatively low temperature so that meat becomes tender.</strong>*</p>

<p>Every hour or so, add more sauce. Don’t let the pan run dry. Add water if you run out sauce.</p>

<h2 id="serving">Serving</h2>

<p><img src="/images/brisket/brisket-cooked.jpg" alt="Cooked Brisket" /></p>

<p><strong><em>
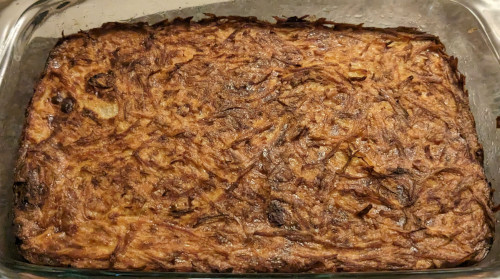
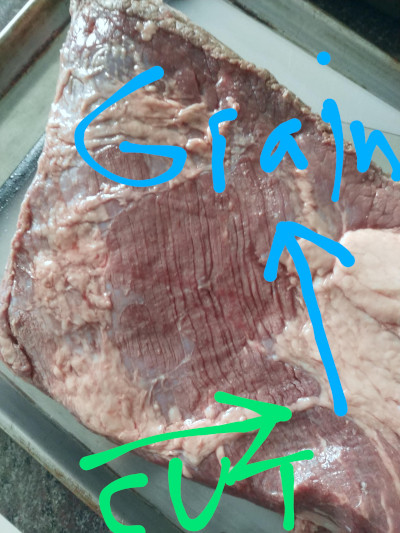
Very Important - Make sure to slice against the grain when serving.</em></strong></p>

<p>In the picture below, the grain is running up and down. You cut from left to right. That’s against the grain. If you slice the brisket with the grain, it will be a chewy, inedible disaster. Don’t do it. To see how the grain the running, flip the brisket so that the fat cap is on the bottom.</p>

<p><img src="/images/brisket/brisket-grain.jpg" alt="Slice Against Grain" /></p>

<p>Enjoy!!!</p>

<p>For history of this family, <a href="https://emlekezik.com">visit Emlekezik.com</a></p>]]></content><author><name></name></author><category term="Meat" /><summary type="html"><![CDATA[]]></summary></entry><entry><title type="html">Aaron’s Potato Kugel Recipe</title><link href="https://recipes.emlekezik.com/recipe/2023/04/04/aarons-potato-kugel-recipe.html" rel="alternate" type="text/html" title="Aaron’s Potato Kugel Recipe" /><published>2023-04-04T00:00:00-10:00</published><updated>2023-04-04T00:00:00-10:00</updated><id>https://recipes.emlekezik.com/recipe/2023/04/04/aarons-potato-kugel-recipe</id><content type="html" xml:base="https://recipes.emlekezik.com/recipe/2023/04/04/aarons-potato-kugel-recipe.html"><![CDATA[<p><img src="/images/kugel/potato-kugel.jpg" alt="Potato Kugel" /></p>

<p>Potato Kugel is one of those  dishes that everyone loves.</p>

<p>What’s not to love about a shredded potato casserole that is baked until it’s crispy on the bottom and top.</p>

<p>My mom did a great potato latke. Kugel was something that she’d buy at the local deli for Pesach.</p>

<p>They’d be served in these small aluminum takeout dishes.</p>

<p>Making them at home is a fair amount of work.</p>

<p>Between the shredding and baking, it’s easily a couple of hours of work.</p>

<p>But it’s worth it.</p>

<p>Here’s Aaron’s Potato Kugel.</p>

<h2 id="ingredients">Ingredients</h2>

<table>
  <thead>
    <tr>
      <th>Ingredient</th>
      <th>Amount</th>
    </tr>
  </thead>
  <tbody>
    <tr>
      <td>Potatoes</td>
      <td>5 or 6</td>
    </tr>
    <tr>
      <td>Onion</td>
      <td>1</td>
    </tr>
    <tr>
      <td>Eggs</td>
      <td>3</td>
    </tr>
    <tr>
      <td>Salt</td>
      <td>1/2 Teaspoon</td>
    </tr>
    <tr>
      <td>Black Pepper</td>
      <td>To Taste</td>
    </tr>
    <tr>
      <td>Vegetable Oil</td>
      <td>3 TBLS aun a bisl for the pan</td>
    </tr>
  </tbody>
</table>

<h2 id="prep">Prep</h2>

<ol>
  <li>Grate potatoes coarsely.</li>
  <li>Grate onion finely.</li>
  <li>Rinse grated potatoes</li>
  <li>Then soak grated potatoes in ice water for 20 minutes.</li>
  <li>Squeeze water from potatoes.</li>
  <li>Mix in grated onions.</li>
  <li>Add in eggs.</li>
  <li>Stir in salt and pepper.</li>
  <li>Add in 3 tablespoons vegetable oil and mix.</li>
  <li>Place in well-oiled glass casserole dish about 8 x 10.</li>
</ol>

<h2 id="bake">Bake</h2>

<p>Bake at 400F (205C) until crispy on top and bottom -  about an hour.</p>

<p>Enjoy!!!</p>

<p>For history of this family, <a href="https://emlekezik.com">visit Emlekezik.com</a></p>]]></content><author><name></name></author><category term="Recipe" /><summary type="html"><![CDATA[]]></summary></entry><entry><title type="html">Bronx NYC Pizza Recipe</title><link href="https://recipes.emlekezik.com/bread/2023/03/22/bronx-nyc-pizza-recipe.html" rel="alternate" type="text/html" title="Bronx NYC Pizza Recipe" /><published>2023-03-22T00:00:00-10:00</published><updated>2023-03-22T00:00:00-10:00</updated><id>https://recipes.emlekezik.com/bread/2023/03/22/bronx-nyc-pizza-recipe</id><content type="html" xml:base="https://recipes.emlekezik.com/bread/2023/03/22/bronx-nyc-pizza-recipe.html"><![CDATA[<iframe width="560" height="315" src="https://www.youtube.com/embed/r3Q3-8dQf3w" title="YouTube video player" frameborder="0" allow="accelerometer; autoplay; clipboard-write; encrypted-media; gyroscope; picture-in-picture; web-share" allowfullscreen=""></iframe>

<p>One of my favorite childhood memories was when a pizza price war broke out among the pizza places around the Grand Concourse. Ten cents got you a slice and a drink. I ate good back then. Must have been in early 1970’s. Not that long ago. Only about fifty years.</p>

<p>It’s hard making that large pie in a home oven.</p>

<p>I’ve tried. Pizza stones are just not big enough. And when you’re sliding a pie into a 500 degree oven, spilling the sauce/cheese on to the oven floor is inevitable.</p>

<p>The solution is using a relatively inexpensive electric oven designed just for baking pizzas. I use the <a href="https://www.breville.com/us/en/products/ovens/bpz600.html">Breville Crispy Pizza Maker</a>.</p>

<h3 id="ingredients">Ingredients</h3>

<p>This will make enough dough for six 10 inch (25 mm) pizzas. It’ll also make a great bagel.</p>

<table>
  <thead>
    <tr>
      <th>Ingredient</th>
      <th>Amount</th>
      <th>Baker’s %</th>
      <th>Volume</th>
    </tr>
  </thead>
  <tbody>
    <tr>
      <td>Water</td>
      <td>740 grams</td>
      <td>58%</td>
      <td>7 TBLSPN</td>
    </tr>
    <tr>
      <td>Salt</td>
      <td>15 grams</td>
      <td>2 %</td>
      <td>2 and 1/2 tsp</td>
    </tr>
    <tr>
      <td>Diastatic Malt OR Sugar *</td>
      <td>15 grams</td>
      <td>2 %</td>
      <td>1 TBLSPN</td>
    </tr>
    <tr>
      <td>Flour (Bread/Unbleached) **</td>
      <td>430 grams</td>
      <td>100 %</td>
      <td>3 1/2 Cups</td>
    </tr>
    <tr>
      <td>Yeast</td>
      <td>1.8 grams</td>
      <td>.25 %</td>
      <td>1 tsp</td>
    </tr>
  </tbody>
</table>

<p>* The old time Bronx pizzerias and bagel joints used diastatic malt rather than sugar. The diastatic malt helps feeds the yeast which increases browning and the rise. You can use sugar in its place.</p>

<p>** Bread flour or all-purpose flour can be used. Bread flour is highly recommended as a higher protein level which means more gluten which means it can stretch more. It’ll also make a more chewy pizza. The flour should be unbleached as it helps with the browning.</p>

<p>Weigh the ingredients. The volume amounts will put you in the ball park, but you might wind up in the seat behind the pillar at Yankee Stadium. Not a good place to be.</p>

<p>Oil is not used when making the dough. Some oil (preferably olive oil) is used to coat the dough balls so they don’t stick to the half-sheet while fermenting. It also keeps the dough balls from drying out.</p>

<h3 id="steps-to-make-dough">Steps To Make Dough</h3>

<p>Put the water, salt, and sugar in a bowl.</p>

<p>Stir to dissolve.</p>

<p>Add the flour. And let the flour sit in the water for about thirty minutes.</p>

<p>Then add the yeast.</p>

<p>Use a fork to combine until it all comes together.</p>

<p>Knead for a few minutes.</p>

<h3 id="first-rise">First Rise</h3>

<p>Divide into dough balls that are about 200 grams. Coat each ball with a thin layer of oil and place the dough balls on an oiled half-sheet. Cover the half-sheet with plastic wrap and refrigerate over night.</p>

<h3 id="second-rise">Second Rise</h3>

<p>About two hours before the bake, take the number of dough balls you’re going to bake out of refrigerator.</p>

<p>Let them rise covered for about two-hours.</p>

<h3 id="bake">Bake</h3>

<p>Preheat oven to 550F (285C).</p>

<p>Press a dough out.</p>

<p>Then add tomato sauce. <a href="https://stanislaus.com/scratch-products/full-red-pizza-sauce/">Use Stanislaus Pizza Sauce for the NY pizzeria taste</a>. If using the Stanislaus sauce, you’ll have to loosen the sauce (it’s almost like a tomato paste) with a little olive oil and water. You also might want to add some salt and sugar to taste. The Stanilaus can be found on Amazon (where else).</p>

<p>Add shredded whole-fat shredded mozzarella cheese. Don’t use fresh mozzarella. It’ll make the pizza too wet. We’re making a Bronx Slice not some fancy-shmancy pizza.</p>

<p>Bake.</p>

<p><a href="https://youtu.be/r3Q3-8dQf3w">Watch the video. It’ll fill-in the blanks</a>.</p>

<p>Enjoy!!!</p>

<p>For history of this family, <a href="https://emlekezik.com">visit Emlekezik.com</a></p>]]></content><author><name></name></author><category term="Bread" /><summary type="html"><![CDATA[]]></summary></entry><entry><title type="html">Using Google Sheets To Create A Bread Recipe Maker</title><link href="https://recipes.emlekezik.com/bread/2023/03/03/using-google-sheets-to-create-a-bread-recipe-maker.html" rel="alternate" type="text/html" title="Using Google Sheets To Create A Bread Recipe Maker" /><published>2023-03-03T00:00:00-10:00</published><updated>2023-03-03T00:00:00-10:00</updated><id>https://recipes.emlekezik.com/bread/2023/03/03/using-google-sheets-to-create-a-bread-recipe-maker</id><content type="html" xml:base="https://recipes.emlekezik.com/bread/2023/03/03/using-google-sheets-to-create-a-bread-recipe-maker.html"><![CDATA[<p><img src="/images/bialy/bialys.jpg" alt="Bialys" /></p>

<p>Once you bake bread for while, you generally move past doing recipes by volume (i.e. - cups, tbsp) and move into the world of weights, hydration and baker’s percentages.</p>

<p>In the United States, we generally use pounds and ounces. But for baking, it’s much more accurate.</p>

<h1 id="intro">Intro</h1>

<h2 id="ounces-grams-and-kilos-oh-my">Ounces, Grams, and Kilos, Oh My</h2>

<p>Here are some general conversion weights:</p>

<table>
  <thead>
    <tr>
      <th>U.S. Weight</th>
      <th>Grams</th>
    </tr>
  </thead>
  <tbody>
    <tr>
      <td>1 ounce</td>
      <td>28 grams</td>
    </tr>
    <tr>
      <td>1 pound</td>
      <td>454 grams</td>
    </tr>
    <tr>
      <td>2.2 pounds</td>
      <td>1000 grams or 1 kilo</td>
    </tr>
  </tbody>
</table>

<p>And here are common ingredients with their weights:</p>

<table>
  <thead>
    <tr>
      <th>Ingredient</th>
      <th>Weight</th>
    </tr>
  </thead>
  <tbody>
    <tr>
      <td>1 teaspoon table salt</td>
      <td>6 grams</td>
    </tr>
    <tr>
      <td>1 cup white sugar</td>
      <td>192 grams</td>
    </tr>
    <tr>
      <td>1 cup water</td>
      <td>240 grams</td>
    </tr>
    <tr>
      <td>1/4 pound butter</td>
      <td>113 grams</td>
    </tr>
    <tr>
      <td>1 cup oil</td>
      <td>220 grams</td>
    </tr>
    <tr>
      <td>1 cup white flour</td>
      <td>125 grams</td>
    </tr>
    <tr>
      <td>1 teaspoon yeast</td>
      <td>2.5 grams</td>
    </tr>
  </tbody>
</table>

<p>Also:</p>

<p>3 teaspoons =  1 tablespoon</p>

<p>16 tablespoons  = 1 cup</p>

<p>With these general numbers, you can convert generally any volume recipe into a weight recipe.</p>

<h2 id="recipe-conversion">Recipe Conversion</h2>

<p>So, if someone gave you a recipe like this:</p>

<div class="language-plaintext highlighter-rouge"><div class="highlight"><pre class="highlight"><code>Flour - 3 cups  
Water - 1 1/8 cups  
Salt - 1 1/8 salt  
Yeast - 3/4 teaspoon  
</code></pre></div></div>

<p>It can be converted into weight by using the known equivalencies:</p>

<div class="language-plaintext highlighter-rouge"><div class="highlight"><pre class="highlight"><code>Flour - 375 grams  
Water - 270 grams  
Salt - 6.75 grams  
Yeast - 1.875 grams  
</code></pre></div></div>

<p>And then one can just weigh the ingredients and get a recipe that can be more accurately reproduced.</p>

<p>The other advantage to using weights is one can start talking about hydration and <a href="https://en.wikipedia.org/wiki/Baker_percentage">baker’s percentages</a>.</p>

<p>Hydration refers to the percentage of water to flour in a recipe. To get hydration, we go back to school and divide two numbers. Since we want to know the percentage of water to flour, water goes on the top and flour goes on the bottom.</p>

<p><code class="language-plaintext highlighter-rouge">270/375</code> is <code class="language-plaintext highlighter-rouge">73.33</code> or roughly <code class="language-plaintext highlighter-rouge">73%</code>.</p>

<p>This hydration would be considered a wet dough that’s hard to handle. To learn how to work with a wet dough, <a href="https://youtu.be/bWN9mxR_iXI">watch this enjoyable YouTube video - The Bertinet Method</a>.</p>

<p>Doughs around 65% and below can be worked with the traditional knead. Bagels and NYC pizza are usually at 58% which means they get kneaded. Baguettes are about 72% hydration so that dough needs to be slapped and folded.</p>

<p>If you tell an experienced baker to bake a bread at 73% hydration that person could whip out the dough without knowing any other ingredients. And that’s because of baker’s percentages.</p>

<h2 id="bakers-percentages">Baker’s Percentages</h2>

<p>In baker’s percentages, all ingredients are calculated as a percentage of the flour. Flour is always 100%. Salt is generally around 2% and yeast is about .5% to 1%.</p>

<p>Take this white bread recipe:</p>

<p>Flour - 375 grams<br />
Water - 270 grams <br />
Salt - 6.75 grams<br />
Yeast - 1.875 grams</p>

<p>It can be converted to baker’s percentages like this:</p>

<p>Flour - 100%<br />
Water  - 73% (270/375)<br />
Salt - 1.8% (6.75/375)<br />
Yeast - .5% (1.875/375)</p>

<h1 id="using-google-sheets-to-create-bread-recipes">Using Google Sheets To Create Bread Recipes</h1>

<p>Then with Baker’s percentages, you can use google sheets to create a spreadsheet that will automatically do the recipe calculations based upon how much dough you need. And this is how you do it:</p>

<ol>
  <li>Create a New sheet</li>
  <li>Rename Tab to White Bread (Right click on the tab and hit Rename)</li>
  <li>Name a field on the sheet - “Total Dough” (This is total amount of dough you want)</li>
  <li>Add a list of the ingredients</li>
  <li>Next to each ingredient add its baker’s percentage</li>
  <li>Sum up all the baker’s percentages</li>
  <li>Divide 1 by the sum of all the baker’s percentages (1/sum).  We’ll call that the ‘Magic Number.’</li>
  <li>Next to ingredient add in a formula to multiply the ingredient’s percentage by the recipe’s magic factor by the total amount of dough you want.</li>
</ol>

<p>Below is an example of how this looks with the formulas in place.</p>

<p><img src="/images/bread-recipe-maker/spreadsheet-formula.jpg" alt="Bread Recipe Formula" /></p>

<blockquote>
  <p>In Google Sheets, the equal sign (=) tells the spreadsheet that a formula is to be calculated. <code class="language-plaintext highlighter-rouge">=Sum(Range of Number)</code> totals up the numbers. <code class="language-plaintext highlighter-rouge">=Round(Formula,1)</code> will round off the formula’s answer to one decimal point. Changing the 1 to a different number will change the number of decimal places. <code class="language-plaintext highlighter-rouge">=Round(Formula) means to round off to the nearest whole number. </code>=(x * y * z)<code class="language-plaintext highlighter-rouge"> will multiply three numbers. To divide is </code>=(x/y)`.</p>
</blockquote>

<p>And here it is with the numbers in place. The only numbers you should change are the “Total Dough” and the “Baker’s Percentages.” The “Total %”, “Magic Number”, and “Recipe” is automatically calculated.</p>

<p><img src="/images/bread-recipe-maker/spreadsheet-calculated.jpg" alt="Bread Recipe Formula" /></p>

<p>Now, that you did it, play around with this spreadsheet.</p>

<p>Change the total dough amount. See that the amounts for each ingredient automatically changes.</p>

<p>Change a baker’s percentage (<strong><em>Don’t change the flour %. Flour is always 100)</em></strong>, the recipe changes again.</p>

<p>To create a totally different recipe, duplicate this tab and use it as a form.</p>

<p>To duplicate a tab, just right click on the tab on the bottom. Then click on “Duplicate.”</p>

<p>To change the name of the new tab, right click on the tab, then hit “Rename.”</p>

<p>Have fun.</p>

<p>For history of this family, <a href="https://emlekezik.com">visit Emlekezik.com</a></p>]]></content><author><name></name></author><category term="Bread" /><summary type="html"><![CDATA[]]></summary></entry><entry><title type="html">Bronx Bialy Recipe</title><link href="https://recipes.emlekezik.com/bread/2023/02/14/bronx-bialy-recipe.html" rel="alternate" type="text/html" title="Bronx Bialy Recipe" /><published>2023-02-14T00:00:00-10:00</published><updated>2023-02-14T00:00:00-10:00</updated><id>https://recipes.emlekezik.com/bread/2023/02/14/bronx-bialy-recipe</id><content type="html" xml:base="https://recipes.emlekezik.com/bread/2023/02/14/bronx-bialy-recipe.html"><![CDATA[<p><img src="/images/bialy/bialys.jpg" alt="Bialys" /></p>

<p>Bronx Bagel Bakeries in the 60’s always sold bialys along with their movie star sibling, the bagel. For the customer, the bialy was usually an afterthought.</p>

<blockquote>
  <p>“Give me a dozen mixed bagels. And, eh, throw in a couple of bialys.”</p>
</blockquote>

<p>The bakery on Jerome Avenue was called the “bagel store.” Not “bialy store.”</p>

<p>And yet, bialys are truly special. With their onions in the middle, they’re a true <a href="https://jel.jewish-languages.org/words/351">mechaya</a>.</p>

<p>Here’s how to make them.</p>

<h3 id="ingredients">Ingredients</h3>

<p>This amount of dough, 720 grams or about 1.5 pounds, will make about eight bialys.</p>

<table>
  <thead>
    <tr>
      <th>Ingredient</th>
      <th>Amount</th>
      <th>Baker’s %</th>
      <th>Volume</th>
    </tr>
  </thead>
  <tbody>
    <tr>
      <td>Water</td>
      <td>257 grams</td>
      <td>58%</td>
      <td>1 Cup + 1 tblspn</td>
    </tr>
    <tr>
      <td>Salt</td>
      <td>9 grams</td>
      <td>2 %</td>
      <td>1 1/2 tsp</td>
    </tr>
    <tr>
      <td>Sugar *</td>
      <td>9 grams</td>
      <td>2 %</td>
      <td>2 tsp</td>
    </tr>
    <tr>
      <td>Flour **</td>
      <td>443 grams</td>
      <td>100 %</td>
      <td>3 1/2 Cups</td>
    </tr>
    <tr>
      <td>Yeast</td>
      <td>2.5 grams</td>
      <td>1 %</td>
      <td>1 tsp</td>
    </tr>
  </tbody>
</table>

<p>* The old time Bronx bakeries used diastatic malt rather than sugar. The diastatic malt helped with the browning and rise. You can use sugar in its place or leave it out all together.</p>

<p>** Bread flour or all-purpose flour can be used. Bread flour has a higher protein level which means more gluten which means it can stretch more. It’ll also make a more chewy bialy. I use all-purpose flour because I bake a lot and don’t want two twenty-five bags of flour sitting around.</p>

<p>In case you think I made a mistake in the recipe, there is NO oil in traditional bialy dough.</p>

<p>Weigh the ingredients. The volume amounts will put you in the ball park, but you might wind up in the seat behind the pillar at Yankee Stadium. Not a good place to be.</p>

<h3 id="steps-to-make-dough">Steps To Make Dough</h3>

<p>Put the water, salt, and sugar in a bowl.</p>

<p>Stir to dissolve.</p>

<p>Add the flour. And let the flour sit in the water for about thirty minutes.</p>

<p>Then add the yeast.</p>

<p>With a fork, mix the flour with the water mixture until it comes together.</p>

<p>Knead for a few minutes.</p>

<h3 id="first-rise">First Rise</h3>

<p>Put in oiled bowl that is covered until the dough is risen (I hate that expression “doubled in size”). It’ll take about 1 - 2 hours.</p>

<h3 id="second-rise">Second Rise</h3>

<p>Divide the dough into eight balls.</p>

<p>Spread the dough balls on a 1/2 sheet that is lined with parchment paper.</p>

<p>Cover with plastic wrap.</p>

<h3 id="make-the-filling">Make The Filling</h3>

<p>Chop 1/2 a yellow onion.</p>

<p>Place the chopped onion a small cup.</p>

<p>Add oil to onions to coat them. You don’t want them swimming in a pool. This ain’t a country club.</p>

<h3 id="shape">Shape</h3>

<p>After the dough balls have risen (about 45 minutes), you need to shape them.</p>

<p>You want to create a very thin skin in the center of the bialy.</p>

<p>I do this by pulling the edges.</p>

<p>Add the onions to the center of the bialys</p>

<h3 id="bake">Bake</h3>

<p>Bake at about 400F (205C) for about seven minutes.</p>

<p>Rotate the tray and bake for another five minutes or so, until the bialys are lightly browned.</p>

<p>Enjoy!!!</p>

<h3 id="thought-process-behind-recipe">Thought Process Behind Recipe</h3>

<p>I doubt anyone is actually wondering how I came up with this recipe but the thought process might be interesting to someone besides me.</p>

<p>My process to create recipes uses <a href="https://en.wikipedia.org/wiki/Baker_percentage">baker’s percentages</a>.</p>

<p>Flour is always at 100% and all ingredients are adjusted as a percentage of the flour.</p>

<p>A good beginning spot for a bagel is at 58% water and that’s what I used.</p>

<p>Salt is usually 2% in bread.</p>

<p>Sugar for browning at 2% is a standard amount.</p>

<p>For fast rising, 1% yeast is standard. When I bake bialys, I will usually adjust the yeast to 1/2% or 1/4%. A longer fermentation gives you more control over the baking process. But when I’m in rush, 1% is the go to amount.</p>

<p>For history of this family, <a href="https://emlekezik.com">visit Emlekezik.com</a></p>]]></content><author><name></name></author><category term="Bread" /><summary type="html"><![CDATA[]]></summary></entry><entry><title type="html">Bronx Doughnut Recipe</title><link href="https://recipes.emlekezik.com/bread/2023/02/12/bronx-doughnut-recipe.html" rel="alternate" type="text/html" title="Bronx Doughnut Recipe" /><published>2023-02-12T00:00:00-10:00</published><updated>2023-02-12T00:00:00-10:00</updated><id>https://recipes.emlekezik.com/bread/2023/02/12/bronx-doughnut-recipe</id><content type="html" xml:base="https://recipes.emlekezik.com/bread/2023/02/12/bronx-doughnut-recipe.html"><![CDATA[<p><img src="/images/doughnut.jpg" alt="Doughnut" /></p>

<p>I don’t remember doughnuts ever being a thing in the Bronx in the 60’s-70’s. There must have been some doughnut place. But nothing stands out. Certainly nothing like a bagel, bialy, <a href="https://recipes.emlekezik.com/bread/2022/12/21/potato-knish-recipe.html">knishes</a>, or <a href="https://recipes.emlekezik.com/bread/2023/01/26/bronx-sicilian-pizza-recipe.html">a slice of pizza</a>.</p>

<p>But today was Super Bowl Sunday (let’s not talk about that referee call) and talk about the snacks, instead.</p>

<p>As long as I had this big pot of oil going for the Buffalo Wings, I might as well fry up some doughnuts.</p>

<p>I had never made them before. But it was shocking how easy and delicious they were. I even used a recipe I wrote my self.</p>

<h3 id="ingredients">Ingredients</h3>

<p>This amount of dough, 500 grams or about 1 pound, will make about ten doughnuts.</p>

<table>
  <thead>
    <tr>
      <th>Ingredient</th>
      <th>Amount</th>
      <th>Baker’s %</th>
      <th>Volume</th>
    </tr>
  </thead>
  <tbody>
    <tr>
      <td>Water</td>
      <td>160 grams</td>
      <td>60%</td>
      <td>2/3 Cup</td>
    </tr>
    <tr>
      <td>Salt</td>
      <td>5 grams</td>
      <td>2 %</td>
      <td>1 tsp</td>
    </tr>
    <tr>
      <td>Sugar</td>
      <td>40 grams</td>
      <td>15 %</td>
      <td>1/5 Cup</td>
    </tr>
    <tr>
      <td>Flour</td>
      <td>265 grams</td>
      <td>100 %</td>
      <td>2 Cups</td>
    </tr>
    <tr>
      <td>Yeast</td>
      <td>2.5 grams</td>
      <td>1 %</td>
      <td>1 tsp</td>
    </tr>
    <tr>
      <td>Butter</td>
      <td>30 grams</td>
      <td>11 %</td>
      <td>1 ounce</td>
    </tr>
  </tbody>
</table>

<h3 id="steps-to-make-dough">Steps To Make Dough</h3>

<p>Put the water, salt, and sugar in a bowl.</p>

<p>Stir to dissolve.</p>

<p>Add the flour. And let the flour sit in the water for about thirty minutes.</p>

<p>Then add the yeast.</p>

<p>With a fork, mix the flour with the water mixture until it comes together like corn meal. Don’t mix it into a ball.</p>

<p>Then add the butter to the flour/water mixture after the “corn meal stage.”</p>

<p>Knead for a few minutes.</p>

<h3 id="first-rise">First Rise</h3>

<p>Put in oiled bowl that is covered until the dough is risen (I hate that expression “doubled in size”). It’ll take about 1 - 2 hours.</p>

<h3 id="second-rise">Second Rise</h3>

<p>Punch the dough down.</p>

<p>Return to the bowl, cover with plastic, and place in refrigeration for an hour or two.</p>

<h3 id="shape">Shape</h3>

<p>Take dough out of refrigerator.</p>

<p>Press the dough into a rectangle about a 1/2 inch thick.</p>

<p>Use the top edge of a cup (about three to four inches wide) and cut out round pieces of dough.</p>

<p>Place the pieces on parchment paper.</p>

<p>Cover with plastic and let rise for about twenty to thirty minutes (they should be puffy).</p>

<p>Fry in oil at about 325F to 350F (165C to 175C).</p>

<p>Flip onto each side until the entire doughnut is golden bread.</p>

<p>Roll in regular sugar.</p>

<p>Enjoy!!!</p>

<h3 id="thought-process-behind-recipe">Thought Process Behind Recipe</h3>

<p>I doubt anyone is actually wondering how I came up with this recipe but the thought process might be interesting to someone besides me.</p>

<p>My process to create recipes uses <a href="https://en.wikipedia.org/wiki/Baker_percentage">baker’s percentages</a>.</p>

<p>Flour is always at 100% and all ingredients are adjusted as a percentage of the flour.</p>

<p>A good beginning spot for a bread recipe is 60% water and that’s what I used.</p>

<p>Salt is usually 2% in bread.</p>

<p>Since this is a sweet bread, I used a high amount of sugar. 15%.</p>

<p>For fast rising, 1% yeast is standard.</p>

<p>Butter at 10% seemed about right but when I actually cut the butter into the recipe, it was closer to 30 grams and so I adjusted the butter in the recipe to 11%.</p>

<p>There are no eggs in the recipe because one egg weighs about 50 grams. With only 265 grams of flour, it would mean that eggs would be close to 20%. That felt like way too much. If I had included eggs, the water percentage would have to be adjusted downward. Egg is 75% water. All this made it easier to leave eggs out.</p>

<p>The doughnut was still great.</p>

<p>For history of this family, <a href="https://emlekezik.com">visit Emlekezik.com</a></p>]]></content><author><name></name></author><category term="Bread" /><summary type="html"><![CDATA[]]></summary></entry><entry><title type="html">Bronx Sicilian Pizza Recipe</title><link href="https://recipes.emlekezik.com/bread/2023/01/26/bronx-sicilian-pizza-recipe.html" rel="alternate" type="text/html" title="Bronx Sicilian Pizza Recipe" /><published>2023-01-26T00:00:00-10:00</published><updated>2023-01-26T00:00:00-10:00</updated><id>https://recipes.emlekezik.com/bread/2023/01/26/bronx-sicilian-pizza-recipe</id><content type="html" xml:base="https://recipes.emlekezik.com/bread/2023/01/26/bronx-sicilian-pizza-recipe.html"><![CDATA[<p><img src="/images/sicilian-pizza/sicilian-pizza-slice.jpg" alt="Sicilian Pizza Slice" /></p>

<p>There used to be a pizza place in the Bronx that served the best Sicilian pizza in the world.</p>

<p>Mario’s was on one those side streets that run off of Morris Park Avenue near Loreto Park. After playing paddle ball or softball, we’d have over for a slice.</p>

<p>Mario’s Sicilian Pizza was dense like a bagel. Not one of those airy focaccia slices that seems to be the rage these days.</p>

<p>It was delicious.</p>

<p>Here’s my take.</p>

<h3 id="ingredients">Ingredients</h3>

<p>This will make enough dough for an 8” x 8”x 2” pan. The dough weighs about 275 grams or 11 ounces.</p>

<p>I like baking the pizza in a smaller sized pan because it allows the pizza to bake in the center. If you want to use a half-sheet pan (13 x 18), triple the amount of the recipe.</p>

<table>
  <thead>
    <tr>
      <th>Ingredient</th>
      <th>Amount</th>
      <th>Baker’s %</th>
      <th>Volume</th>
    </tr>
  </thead>
  <tbody>
    <tr>
      <td>Water</td>
      <td>95 grams</td>
      <td>56%</td>
      <td>7 TBLSPN</td>
    </tr>
    <tr>
      <td>Salt</td>
      <td>3 grams</td>
      <td>2 %</td>
      <td>1/2 tsp</td>
    </tr>
    <tr>
      <td>Sugar</td>
      <td>3 grams</td>
      <td>2 %</td>
      <td>1/2 TBLSPN</td>
    </tr>
    <tr>
      <td>Flour **</td>
      <td>170 grams</td>
      <td>100 %</td>
      <td>1 1/2 Cups</td>
    </tr>
    <tr>
      <td>Yeast</td>
      <td>1.5 grams</td>
      <td>1 %</td>
      <td>1/8 tsp</td>
    </tr>
    <tr>
      <td>Oil ***</td>
      <td>3 grams</td>
      <td>2 %</td>
      <td>1 tsp</td>
    </tr>
  </tbody>
</table>

<p>* The old time Bronx pizzerias used diastatic malt rather than sugar. The diastatic malt helped with the browning and rise. You can use sugar in its place.</p>

<p>** Bread flour or all-purpose flour can be used. Bread flour has a higher protein level which means more gluten which means it can stretch more. It’ll also make a more chewy pizza. I use all-purpose flour because I bake a lot and don’t want two twenty-five bags of flour sitting around.</p>

<p>*** Oil is optional. Traditional NYC Pizza and Bagels are made without oil.</p>

<p>Weigh the ingredients. The volume amounts will put you in the ball park, but you might wind up in the seat behind the pillar at Yankee Stadium. Not a good place to be.</p>

<h3 id="steps-to-make-dough">Steps To Make Dough</h3>

<p>Put the water, salt, and sugar in a bowl.</p>

<p>Stir to dissolve.</p>

<p>Add the flour. And let the flour sit in the water for about thirty minutes.</p>

<p>Then add the yeast.</p>

<p>With a fork, mix the flour with the water mixture until it comes together like corn meal. Don’t mix it into a ball. It’ll make it harder to add the oil.</p>

<p>Then add the oil to the flour/water mixture after the “corn meal stage.”</p>

<p>Use a fork to combine until it all comes together.</p>

<p>Knead for a few minutes.</p>

<h3 id="first-rise">First Rise</h3>

<p>Put in oiled bowl that is covered until the dough is risen (I hate that expression “doubled in size”). It’ll take about 1 - 2 hours.</p>

<h3 id="second-rise">Second Rise</h3>

<p>Press Dough Into 8”x 8”x 2” Pan.</p>

<p>Let rise for about another 1/2 hour.</p>

<h3 id="parbake">ParBake</h3>

<p>You’re going to first bake the dough a little sauce and NO cheese.</p>

<p>Preheat oven to 450F (230C). If it’s a convection oven, lower the temperature to 400F.</p>

<p>Cover the dough with a light layer of tomato sauce.</p>

<p><img src="/images/sicilian-pizza/sicilian-pizza-parbake.jpg" alt="Sicilian Pizza Slice" /></p>

<p>Bake in bottom third of the oven for about 12 - 14 minutes.</p>

<p>Take the pan from the oven.</p>

<p>Check if the bottom of the crust has somewhat browned.</p>

<p>Cover with more tomato sauce.</p>

<p><img src="/images/sicilian-pizza/sicilian-pizza-sauce.jpg" alt="Sicilian Pizza Slice" /></p>

<p>And cheese.</p>

<p><img src="/images/sicilian-pizza/sicilian-pizza-ready.jpg" alt="Sicilian Pizza Slice" /></p>

<h3 id="bake-again">Bake Again</h3>

<p>Bake for another 10 - 12 minutes or until the cheese is melted the way you like.</p>

<p><img src="/images/sicilian-pizza/sicilian-pizza-baked.jpg" alt="Sicilian Pizza Slice" /></p>

<p>And the bottom is nice and brown.</p>

<p><img src="/images/sicilian-pizza/sicilian-pizza-bottom-crust.jpg" alt="Sicilian Pizza Slice" /></p>

<p>Enjoy!!!</p>

<p>For history of this family, <a href="https://emlekezik.com">visit Emlekezik.com</a></p>]]></content><author><name></name></author><category term="Bread" /><summary type="html"><![CDATA[]]></summary></entry><entry><title type="html">Apple Pie Recipe</title><link href="https://recipes.emlekezik.com/dessert/2022/12/25/apple-pie-recipe.html" rel="alternate" type="text/html" title="Apple Pie Recipe" /><published>2022-12-25T00:00:00-10:00</published><updated>2022-12-25T00:00:00-10:00</updated><id>https://recipes.emlekezik.com/dessert/2022/12/25/apple-pie-recipe</id><content type="html" xml:base="https://recipes.emlekezik.com/dessert/2022/12/25/apple-pie-recipe.html"><![CDATA[<p><img src="/images/pie/38-pie-baked.jpg" alt="Baked Apple Pie" /></p>

<p>I never had apple pie growing up.</p>

<p>My mother would sometimes bring home apple turnovers or a chocolate layer log cake. But apple pies were just not part of the Bronx bakery menu.</p>

<p>My favorite treat were the black and white cookies. And Italian bakeries would sell a “Chinese Cookie.” I don’t know what made it “Chinese,” but that’s what we called them.</p>

<p>I think the first time I ever tried apple pie was when I was an adult. I was visiting San Francisco and on Chestnut Street there was this pie place.</p>

<p>Over the many years since then, I would try to make a pie. Carefully cutting the cold butter into the cold flour with the cold pastry blade. It never seemed to work just right. The crust would turn out tough. Not the flaky texture that I craved.</p>

<p>I spent many hours going from one website to another, looking for the solution. Nothing seemed to work. The I saw some recipe from this chef Thomas Keller. It was about using a mixer to make the crust.</p>

<p>Like George Costanza learning to bake, it was the opposite of every approach I had ever followed before.</p>

<p>Anyway, here’s how I make apple pie.</p>

<h2 id="pie-crust-dough-recipe">Pie Crust Dough Recipe</h2>

<p><img src="/images/pie/15-butter-flour.jpg" alt="Butter with Flour" /></p>

<p><img src="/images/pie/18-butter-flour.jpg" alt="Butter with Flour" /></p>

<p><img src="/images/pie/19-butter-flour.jpg" alt="Butter with Flour" /></p>

<p><img src="/images/pie/20-butter-flour.jpg" alt="Butter with Flour" /></p>

<p><img src="/images/pie/22-butter-flour.jpg" alt="Butter with Flour" /></p>

<p><img src="/images/pie/23-butter-water.jpg" alt="Butter with Flour" /></p>

<p><img src="/images/pie/24-butter-table.jpg" alt="Butter with Flour" /></p>

<p><img src="/images/pie/25-dough-divide.jpg" alt="Butter with Flour" /></p>

<p><img src="/images/pie/38-pie-baked.jpg" alt="Butter with Flour" /></p>

<h3 id="ingredients">Ingredients</h3>

<table>
  <thead>
    <tr>
      <th>Ingredients</th>
      <th>Amount</th>
    </tr>
  </thead>
  <tbody>
    <tr>
      <td>Butter</td>
      <td>2 Sticks - 226 grams</td>
    </tr>
  </tbody>
</table>

<h3 id="directions-for-pie-dough">Directions For Pie Dough</h3>

<h2 id="apple-filling-recipe">Apple Filling Recipe</h2>

<p><img src="/images/pie/31-apple-peel.jpg" alt="Butter with Flour" /></p>

<p>Refrigerate over night.</p>

<h2 id="roll-out-dough">Roll Out Dough</h2>

<p><img src="/images/pie/33-dough-pin.jpg" alt="Butter with Flour" /></p>

<p><img src="/images/pie/34-dough-rolled.jpg" alt="Butter with Flour" /></p>

<p><img src="/images/pie/35-dough-docked.jpg" alt="Butter with Flour" /></p>

<p><img src="/images/pie/36-dough-apple.jpg" alt="Butter with Flour" /></p>

<p><img src="/images/pie/37-pie-raw.jpg" alt="Butter with Flour" /></p>

<p><img src="/images/pie/38-pie-baked.jpg" alt="Baked Apple Pie" /></p>

<p>Enjoy!!!</p>

<p>For history of this family, <a href="https://emlekezik.com">visit Emlekezik.com</a></p>]]></content><author><name></name></author><category term="Dessert" /><summary type="html"><![CDATA[]]></summary></entry></feed>